客製Android專案預設的UI風格。
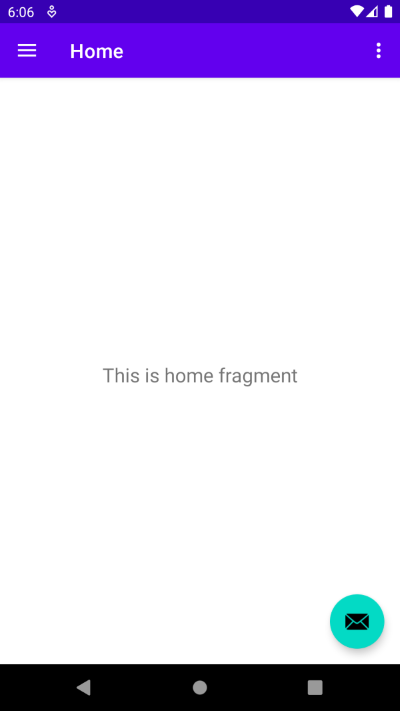
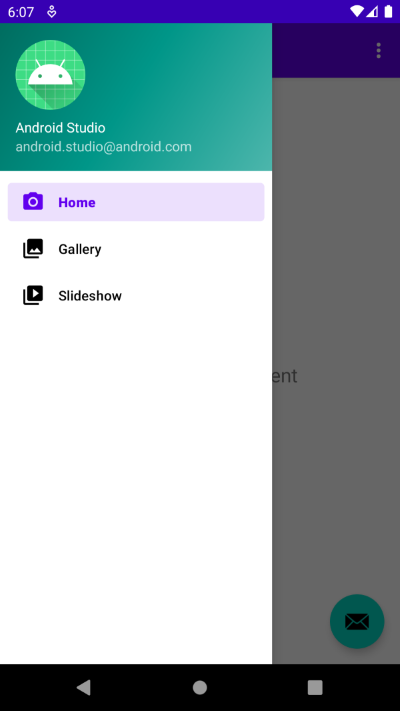
初始樣式
一開始建立專案,風格會長這樣,為Material design 2,參考https://m2.material.io/design/color/the-color-system.html


相關配置
colors.xml
1
2
3
4
5
6
7
8
9
10
| <?xml version="1.0" encoding="utf-8"?>
<resources>
<color name="purple_200">#FFBB86FC</color>
<color name="purple_500">#FF6200EE</color>
<color name="purple_700">#FF3700B3</color>
<color name="teal_200">#FF03DAC5</color>
<color name="teal_700">#FF018786</color>
<color name="black">#FF000000</color>
<color name="white">#FFFFFFFF</color>
</resources>
|
themes.xml
1
2
3
4
5
6
7
8
9
10
11
12
13
14
15
16
17
18
19
20
21
22
23
24
25
| <resources xmlns:tools="http://schemas.android.com/tools">
<style name="Theme.MyApplication" parent="Theme.MaterialComponents.DayNight.DarkActionBar">
<item name="colorPrimary">@color/purple_500</item>
<item name="colorPrimaryVariant">@color/purple_700</item>
<item name="colorOnPrimary">@color/white</item>
<item name="colorSecondary">@color/teal_200</item>
<item name="colorSecondaryVariant">@color/teal_700</item>
<item name="colorOnSecondary">@color/black</item>
<item name="android:statusBarColor">?attr/colorPrimaryVariant</item>
</style>
<style name="Theme.MyApplication.NoActionBar">
<item name="windowActionBar">false</item>
<item name="windowNoTitle">true</item>
</style>
<style name="Theme.MyApplication.AppBarOverlay" parent="ThemeOverlay.AppCompat.Dark.ActionBar" />
<style name="Theme.MyApplication.PopupOverlay" parent="ThemeOverlay.AppCompat.Light" />
</resources>
|
調整Dialog樣式
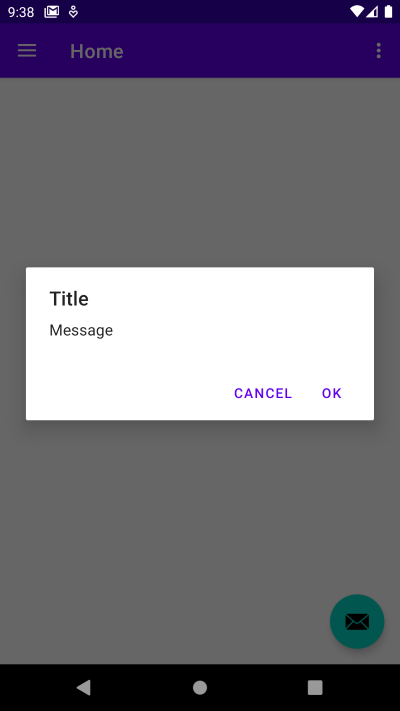
預設的樣式如下,通常會為了整體UI風格調整標題和按鈕顏色。
1
2
3
4
5
6
| new AlertDialog.Builder(MainActivity.this)
.setTitle("Title")
.setMessage("Message")
.setPositiveButton("OK", null)
.setNegativeButton("Cancel", null)
.show();
|

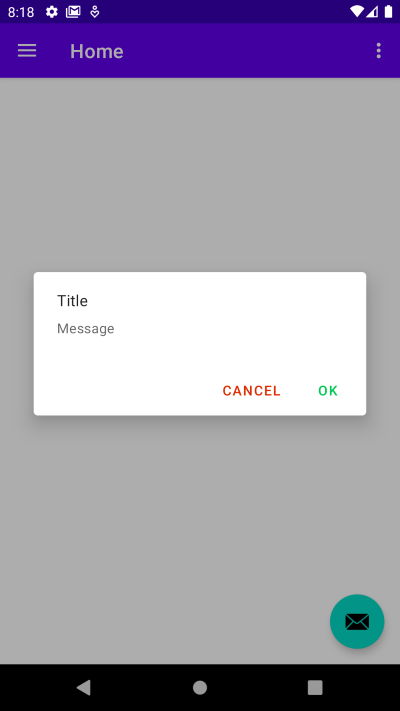
若要調整兩顆按鈕為不同顏色,可用MaterialAlertDialogBuilder。還不是最好的解法,但先記錄下來。
1
2
3
4
5
6
| new MaterialAlertDialogBuilder(MainActivity.this)
.setTitle("Title")
.setMessage("Message")
.setPositiveButton("OK", null)
.setNegativeButton("Cancel", null)
.show();
|

對應的style調整如下
1
2
3
4
5
6
7
8
9
10
11
12
13
14
15
16
17
18
19
20
21
22
23
| <resources xmlns:tools="http://schemas.android.com/tools">
<style name="Theme.MyApplication" parent="Theme.MaterialComponents.DayNight.DarkActionBar">
<item name="materialAlertDialogTheme">@style/Theme.MyApplication.AlertDialog</item>
</style>
<style name="Theme.MyApplication.AlertDialog" parent="ThemeOverlay.MaterialComponents.MaterialAlertDialog">
<item name="buttonBarPositiveButtonStyle">@style/PositiveButtonStyle</item>
<item name="buttonBarNegativeButtonStyle">@style/NegativeButtonStyle</item>
</style>
<style name="PositiveButtonStyle" parent="Widget.MaterialComponents.Button.TextButton.Dialog">
<item name="android:textColor">#00C853</item>
<item name="rippleColor">#00E676</item>
</style>
<style name="NegativeButtonStyle" parent="Widget.MaterialComponents.Button.TextButton.Dialog">
<item name="android:textColor">#DD2C00</item>
<item name="rippleColor">#FF3D00</item>
</style>
</resources>
|
客製化View的屬性
需覆寫含兩個參數的建構子,才可應用在xml上。
其中字型大小需特別注意,在Pixel 1080x1920的density為2.625,用getDimension()取得12sp的輸出會是52.5px,所以setTextSize()時要用TypedValue.COMPLEX_UNIT_PX轉換回去,才可正常顯示大小。
參考Android中getDimension,getDimensionPixelOffset和getDimensionPixelSize 区别
1
2
3
4
5
6
7
8
9
10
11
12
13
14
15
16
17
18
19
20
21
22
23
24
25
26
27
28
29
30
31
32
| public class CustomView extends LinearLayout {
private LayoutCustomBinding binding;
public CustomView(Context context, @Nullable AttributeSet attrs) {
this(context, attrs, 0, 0);
}
public CustomView(Context context, AttributeSet attrs, int defStyleAttr, int defStyleRes) {
super(context, attrs, defStyleAttr, defStyleRes);
binding = LayoutCustomBinding.inflate(LayoutInflater.from(context), this, true);
TypedArray a = context.getTheme().obtainStyledAttributes(attrs, R.styleable.CustomView, defStyleAttr, defStyleRes);
text = a.getString(R.styleable.CustomView_label);
if (!TextUtils.isEmpty(text)) {
binding.tv.setText(text);
}
float size = a.getDimension(R.styleable.CustomView_labelSize, 0);
if (size > 0) {
binding.tv.setTextSize(TypedValue.COMPLEX_UNIT_PX, size);
}
int color = a.getColor(R.styleable.CustomView_labelColor, Color.BLACK);
binding.tv.setTextColor(color);
a.recycle();
}
}
|
layout_custom.xml
1
2
3
4
5
6
7
8
9
10
11
12
| <?xml version="1.0" encoding="utf-8"?>
<LinearLayout xmlns:android="http://schemas.android.com/apk/res/android"
android:layout_width="match_parent"
android:layout_height="wrap_content"
android:orientation="horizontal">
<TextView
android:id="@+id/tv"
android:layout_width="wrap_content"
android:layout_height="wrap_content" />
</LinearLayout>
|
values/attrs.xml
1
2
3
4
5
6
7
8
| <?xml version="1.0" encoding="utf-8"?>
<resources>
<declare-styleable name="CustomView">
<attr name="label" format="string" />
<attr name="labelSize" format="dimension" />
<attr name="labelColor" format="color" />
</declare-styleable>
</resources>
|
底線背景
不額外新建View來分隔項目,而是用drawable畫底線實現。
參考https://stackoverflow.com/questions/9915793/shape-drawable-as-background-a-line-at-the-bottom
1
2
3
4
5
6
7
8
9
10
11
12
13
| <?xml version="1.0" encoding="utf-8"?>
<layer-list xmlns:android="http://schemas.android.com/apk/res/android">
<item
android:left="-1dp"
android:right="-1dp"
android:top="-1dp">
<shape>
<stroke
android:width="1dp"
android:color="@color/black" />
</shape>
</item>
</layer-list>
|
ProgressDialog改用ProgressBar
設定clickable為true,避免點擊到底下的物件;設定elevation為2dp,置於所有物件的上層。
1
2
3
4
5
6
7
8
9
10
11
12
13
14
15
16
17
18
19
20
21
22
23
24
25
26
27
28
29
| <?xml version="1.0" encoding="utf-8"?>
<androidx.constraintlayout.widget.ConstraintLayout xmlns:android="http://schemas.android.com/apk/res/android"
xmlns:app="http://schemas.android.com/apk/res-auto"
android:layout_width="match_parent"
android:layout_height="match_parent"
android:background="@color/mask"
android:clickable="true"
android:elevation="2dp"
android:focusable="true">
<ProgressBar
android:id="@+id/progress_bar"
android:layout_width="wrap_content"
android:layout_height="wrap_content"
app:layout_constraintBottom_toBottomOf="parent"
app:layout_constraintEnd_toEndOf="parent"
app:layout_constraintStart_toStartOf="parent"
app:layout_constraintTop_toTopOf="parent" />
<TextView
android:id="@+id/tv_message"
android:layout_width="wrap_content"
android:layout_height="wrap_content"
android:text="@string/loading"
app:layout_constraintEnd_toEndOf="parent"
app:layout_constraintStart_toStartOf="parent"
app:layout_constraintTop_toBottomOf="@id/progress_bar" />
</androidx.constraintlayout.widget.ConstraintLayout>
|
參考資料
- https://stackoverflow.com/questions/36918219/how-to-disable-user-interaction-while-progressbar-is-visible-in-android
- https://stackoverflow.com/questions/44351354/android-constraintlayout-put-one-view-on-top-of-another-view


