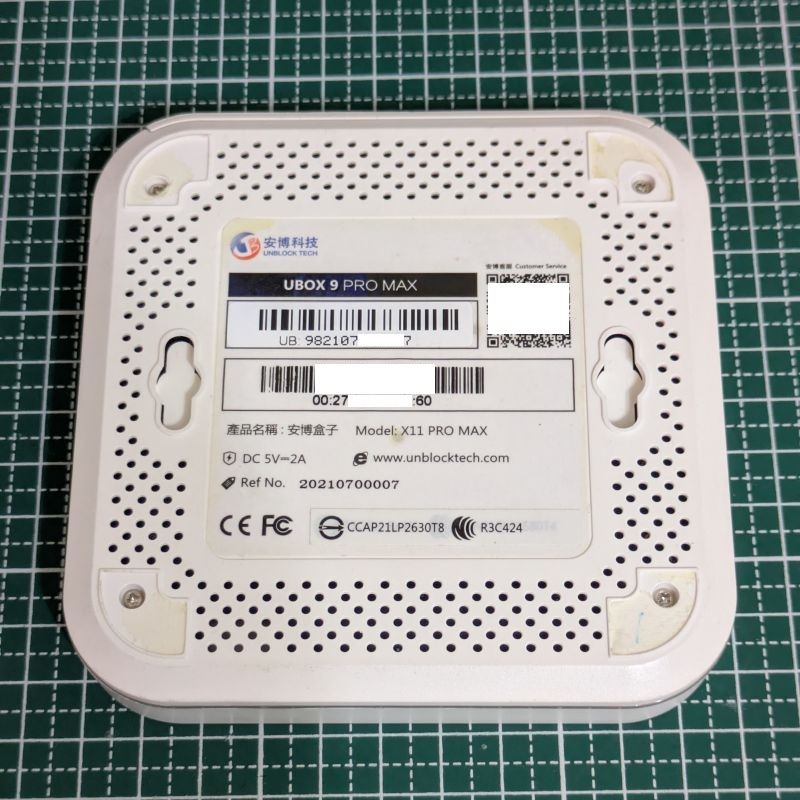
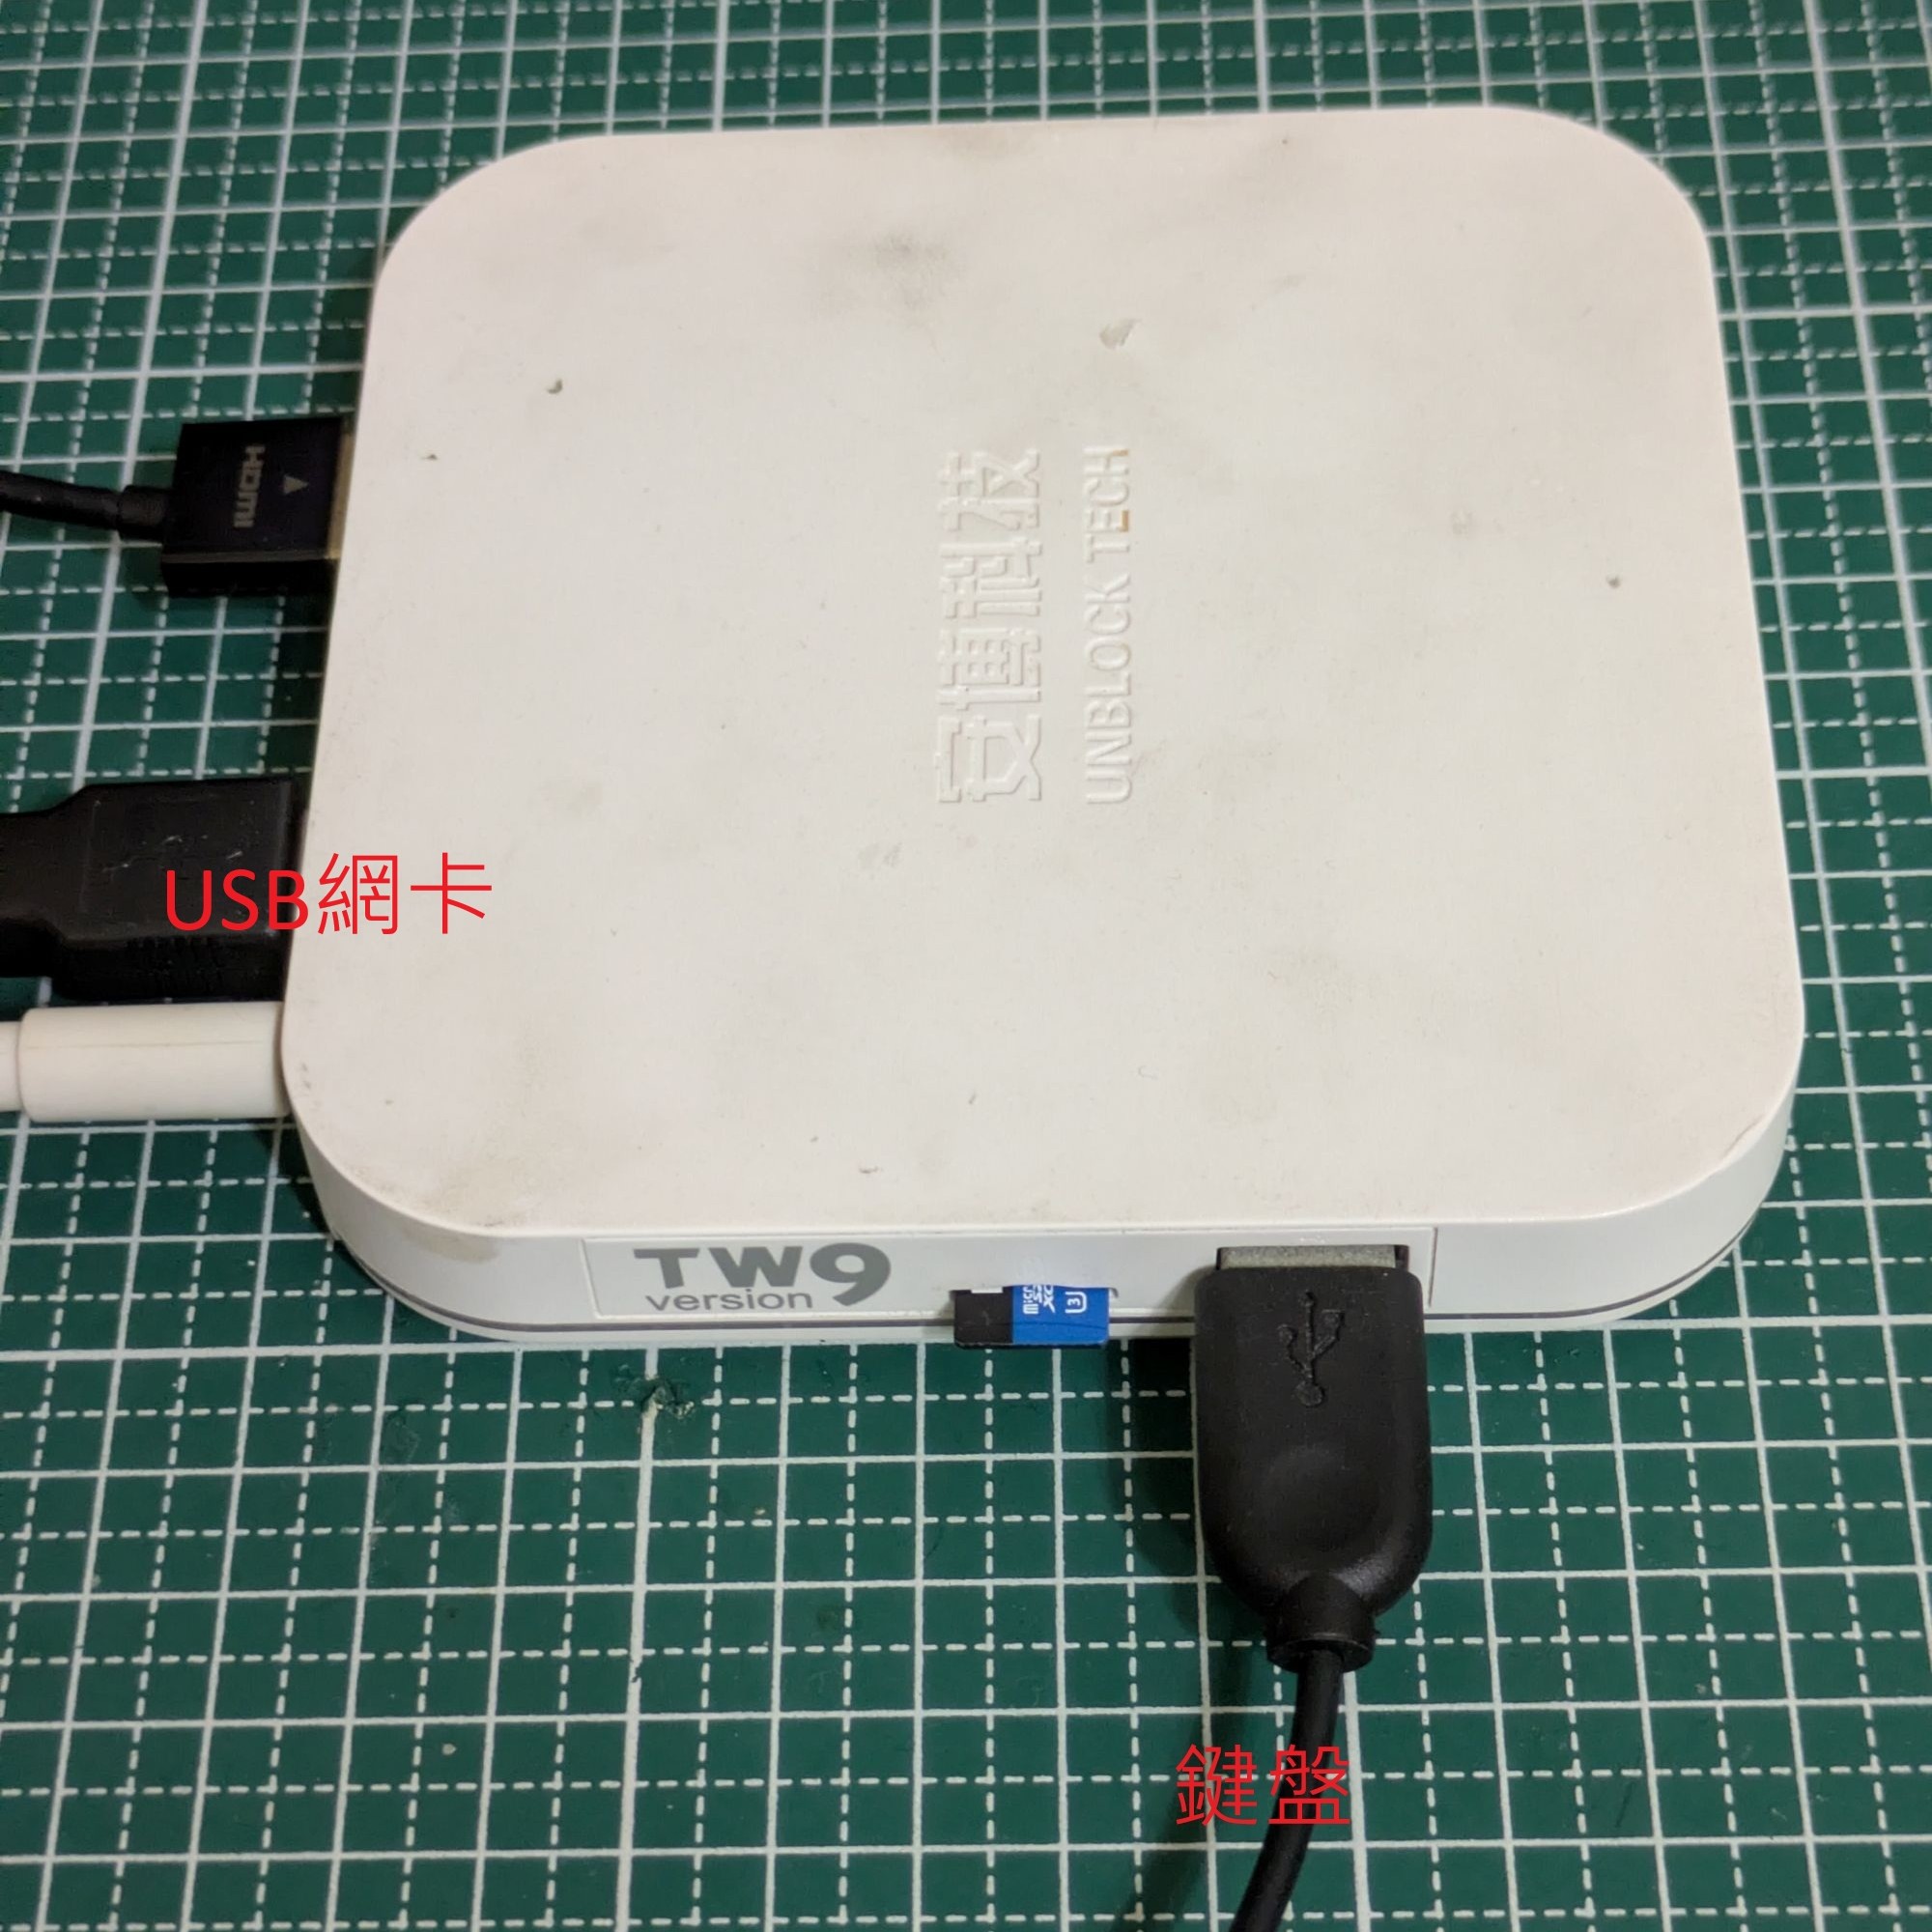
這次使用的是安博盒子 UBOX 9 PRO MAX,CPU 比較夠力,刷 Armbian 跑看看。順便認識 linux kernel 編譯。
拆解
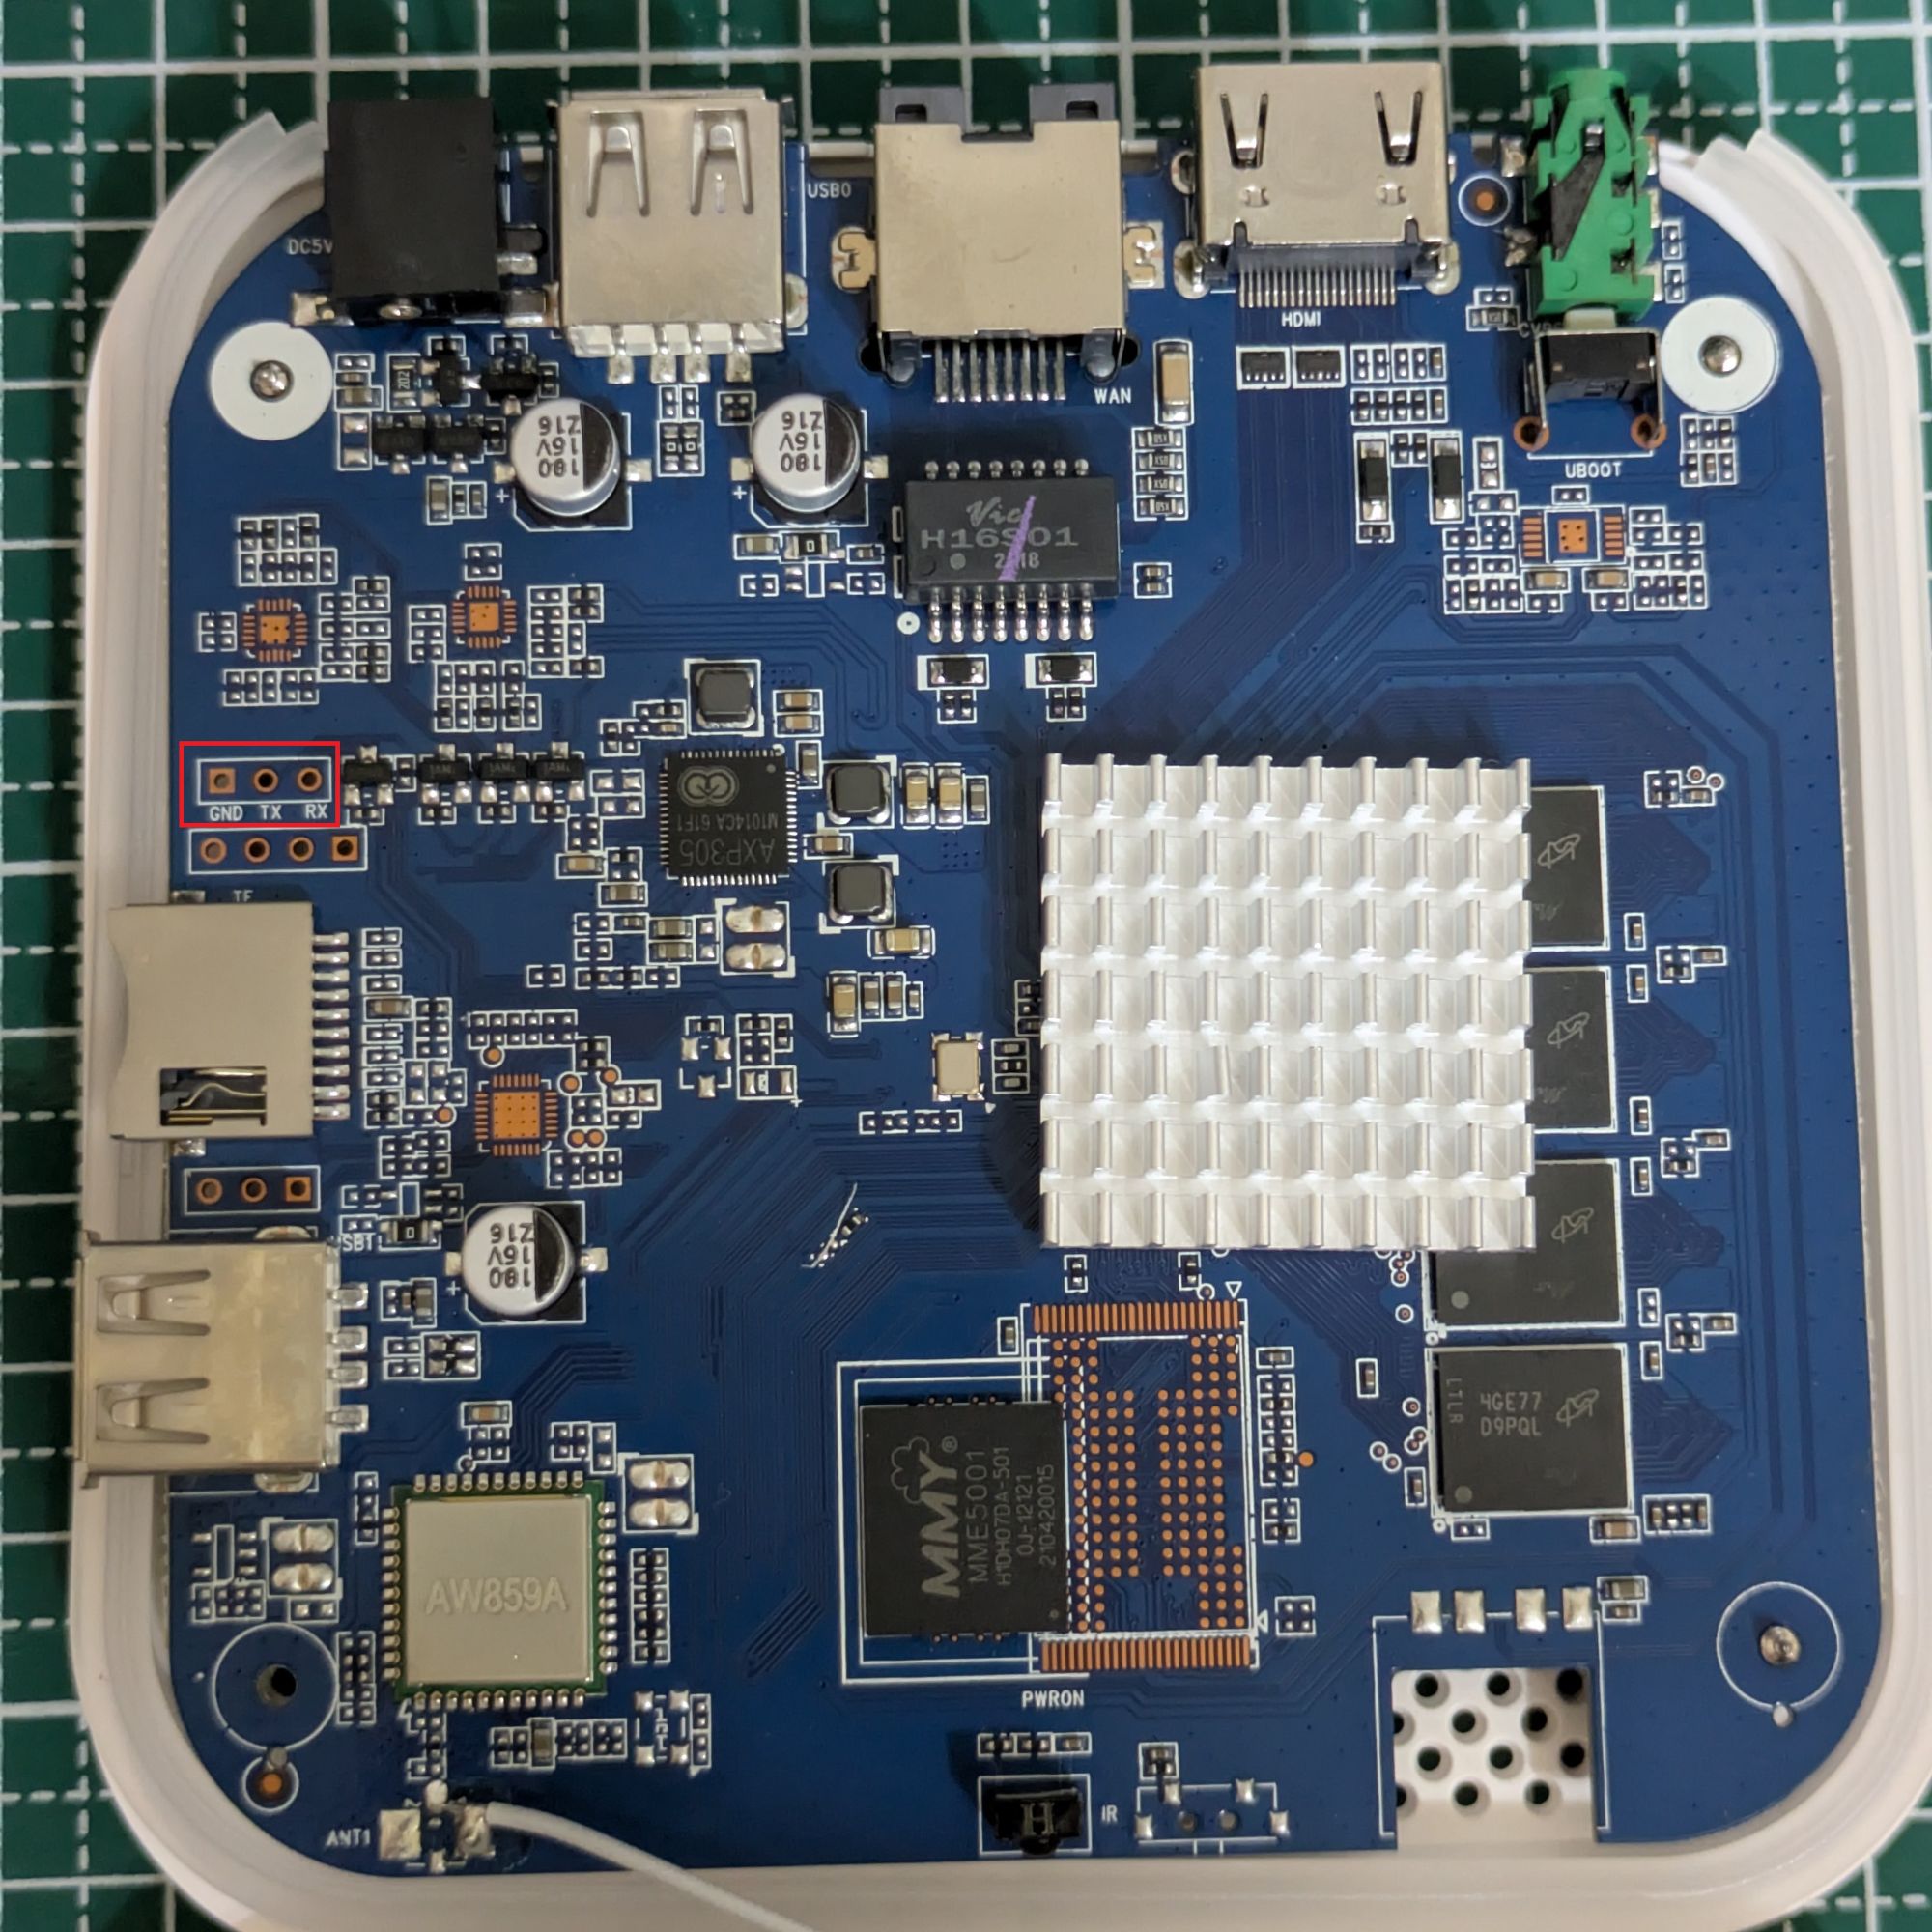
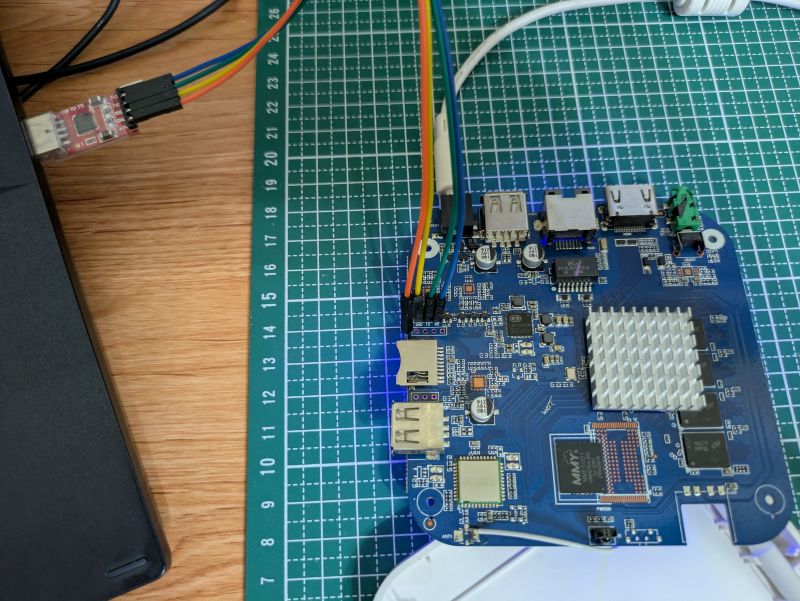
拆解後,找到 TTL 接腳 (紅框),依標示接上 CP2102 (USB 轉 TTL) 的晶片,波特率為 115200。
完整的啟動資訊如下
1
2
3
4
5
6
7
8
9
10
11
12
13
14
15
16
17
18
19
20
21
22
23
24
25
26
27
28
29
30
31
32
33
34
35
36
37
38
39
40
41
42
43
44
45
46
47
48
49
50
51
52
53
54
55
56
57
58
59
60
61
62
63
64
65
66
67
68
69
70
71
72
73
74
75
76
77
78
79
80
81
82
83
84
85
86
87
88
89
90
91
92
93
94
95
96
97
98
99
100
101
102
103
104
105
106
107
108
109
110
111
112
113
114
115
116
117
118
119
120
121
122
123
124
125
126
127
128
129
130
131
132
133
134
135
136
137
138
139
140
141
142
143
144
145
146
147
148
149
150
151
152
153
154
155
156
157
158
159
160
161
162
163
164
165
166
167
168
169
170
171
172
[399]HELLO! BOOT0 is starting! [402]BOOT0 commit : 4656b05 [405]set pll start [407]periph0 has been enabled [410]set pll end [412]unknow PMU [414]PMU: AXP806 [421]vaild para:16 select dram para4 [425]board init ok [426]DRAM BOOT DRIVE INFO: V0.532 [430]the chip id is 0x5000 [432]chip id check OK [435]DRAM_VCC set to 1500 mv [439]read_calibration error [443]read_calibration error [447]read_calibration error [451]read_calibration error [455]read_calibration error [459]read_calibration error [463]read_calibration error [467]read_calibration error [471]read_calibration error [475]read_calibration error [477]retraining final error [484][AUTO DEBUG]32bit,1 ranks training success! [491]DRAM CLK =648 MHZ [493]DRAM Type =3 (3:DDR3,4:DDR4,7:LPDDR3,8:LPDDR4) [500]Actual DRAM SIZE =4096 M [502]DRAM SIZE =4096 MBytes, para1 = 310b, para2 = 10000000, dram_tpr13 = 6041 [515]DRAM simple test OK. [517]rtc standby flag is 0x0, super standby flag is 0x0 [523]dram size =4096 [526]card no is 2 [527]sdcard 2 line count 8 [530][mmc]: mmc driver ver 2019-12-19 10:41 [534][mmc]: set f_max to 50M, set f_max_ddr to 50M [539][mmc]: mmc 2 bias 4 [547][mmc]: ***Try MMC card 2*** [560][mmc]: MMC 5.0 [562][mmc]: HSDDR52/DDR50 8 bit [565][mmc]: 50000000 Hz [568][mmc]: 59008 MB [570][mmc]: ***SD/MMC 2 init OK!!!*** [639]Loading boot-pkg Succeed(index=0). [643]Entry_name = u-boot [652]Entry_name = monitor [656]Entry_name = dtbo [659]Entry_name = dtb [662]tunning data addr:0x4a0003e8 [665]Jump to second Boot. NOTICE: BL3-1: v1.0(debug):09e19e7 NOTICE: BL3-1: Built : 11:30:42, 2020-09-29 NOTICE: BL3-1 commit: 8 ERROR: Error initializing runtime service tspd_fast NOTICE: BL3-1: Preparing for EL3 exit to normal world NOTICE: BL3-1: Next image address = 0x4a000000 NOTICE: BL3-1: Next image spsr = 0x1d3 U-Boot 2018.05-00007-g782b5e0-dirty (Aug 16 2021 - 10:46:05 +0800) Allwinner Technology [00.741]CPU: Allwinner Family [00.744]Model: sun50iw9 I2C: ready [00.748]DRAM: 2 GiB [00.751]Relocation Offset is: 75ec5000 [00.789]secure enable bit: 0 [00.792]pmu_axp152_probe pmic_bus_read fail [00.796]PMU: AXP806 [00.801]CPU=1008 MHz,PLL6=600 Mhz,AHB=200 Mhz, APB1=100Mhz MBus=400Mhz [00.992]sunxi overlay merged okqv [00.995]drv_disp_init [01.026]__clk_enable: clk is null. [01.032]drv_disp_init finish [01.034]gic: 20201231 sec monitor mode [01.048]flash init start [01.050]workmode = 0,storage type = 2 [01.053]MMC: 2 [01.055]********* 20210428 0************ [01.058]********* 20210428 1************ [01.062]get mem for descripter OK ! [01.071]get sdc2 sdc_boot0_sup_1v8 fail. [01.076]io is 1.8V [01.077]********* 20210428 2************ [01.081]********* 20210428 3************ [01.085]********* 20210428 mmc_start_init ************ sprite_led_gpio start [01.094]********* 20210428 gpio ok************ [01.098]********* 20210428 6************ [01.102]********* 20210428 7************ [01.105]********* 20210428 8************ [01.109]********* 20210428 9************ [01.130]already at HSSDR52_SDR25 mode [01.133]sunxi flash init ok [01.137]Loading Environment from SUNXI_FLASH... OK [01.147]usb burn from boot delay time 0 weak:otg_phy_config [01.160]usb prepare ok [01.963]overtime [01.967]do_burn_from_boot usb : no usb exist [01.971]boot_gui_init:start FAT: Misaligned buffer address (bbe80cd8) 32 bytes read in 5 ms (5.9 KiB/s) sprite_time_func= blue only [02.259]boot_gui_init:finish [02.262]bmp_name=bootlogo.bmp 2764856 bytes read in 24 ms (109.9 MiB/s) [02.307]hsddr 2-50000000 [02.309]hs200 5-200000000 [02.311]hs400 3-100000000 [02.314]get max-frequency ok 100000000 Hz [02.318]0 0 0: 0 0 0 [02.323]update dts ** Unrecognized filesystem type ** [02.338]load file(ULI/factory/rootwait init.txt) error. [02.343]name in map snum [02.345]name in map mac ** Unrecognized filesystem type ** [02.361]load file(ULI/factory/wifi_mac.txt) error. ** Unrecognized filesystem type ** [02.379]load file(ULI/factory/bt_mac.txt) error. ** Unrecognized filesystem type ** [02.397]load file(ULI/factory/selinux.txt) error. ** Unrecognized filesystem type ** [02.414]load file(ULI/factory/specialstr.txt) error. [02.433]update part info [02.452]update bootcmd [02.454]No ethernet found. Hit any key to stop autoboot: 0 [04.685]Starting kernel ... [04.687]mmc exit start [04.699]mmc 2 exit ok [ 0.000000] Booting Linux on physical CPU 0x0 [ 0.000000] Linux version 4.9.170 (yifan@yifan-Z270-HD3) (gcc version 5.3.1 20160412 (Linaro GCC 5.3-2016.05) ) [ 0.000000] Boot CPU: AArch64 Processor [410fd034] [ 0.000000] bootconsole [earlycon0] enabled [ 0.027741] BOOTEVENT: 27.727749: ON [ 0.251878] sunxi_i2c_probe()2209 - [i2c3] warning: failed to get regulator id [ 0.252877] sunxi_i2c_probe()2209 - [i2c5] warning: failed to get regulator id [ 0.303860] acx00_i2c_probe,l:282 [ 0.304019] [ac200] pwm is NULL! Just initialize it. [ 0.304813] [ac200] pwm enable [ 0.304846] [ac200] pwm is initialized [ 0.304923] acx00_init_work,l:130 [ 0.305644] acx00_init_work,l:137 [ 0.306130] sunxi_i2c_do_xfer()1935 - [i2c5] incomplete xfer (status: 0x20, dev addr: 0x10) [ 0.312013] [ac200] get ave_regulator_name failed! [ 0.403127] failed to get standby led pin assign [ ▒[ 0.409753] uart uart1: get regulator failed [ 0.442077] [NAND][NE] Not found valid nand node on dts [ 0.450795] sunxi-wlan soc@03000000:wlan: get gpio chip_en failed [ 0.457679] sunxi-wlan soc@03000000:wlan: get gpio power_en failed [ 0.596362] hci: request ohci1-controller gpio:232 [ 0.787556] axp2101_pek: axp2101-pek can not register without irq [ 0.797816] sunxi_ir_startup: get ir protocol failed [ 0.806014] VE: get debugfs_mpp_root is NULL, please check mpp [ 0.806014] [ 0.814271] VE: sunxi ve debug register driver failed! [ 0.814271] [ 0.829634] mmc:failed to get gpios [ 0.909011] mmc:failed to get gpios [ 0.945678] sunxi-mmc sdc1: smc 2 p1 err, cmd 52, RTO !! [ 0.952484] sunxi-mmc sdc1: smc 2 p1 err, cmd 52, RTO !! [ 0.954243] failed get gpio-spdif gpio from dts,spdif_gpio:-2 [ 0.956129] [sunxi_internal_codec_probe]:get audio avcc failed [ 0.956165] [sunxi_internal_codec_probe]:get audio vcc3v3-audio failed [ 0.956399] [audio-codec]dachpf_cfg configurations missing or invalid. [ 0.956409] lineout_vol:26, linein_gain:3, fmin_gain:3, digital_vol:0, adcdrc_cfg:0, adchpf_cfg:0, dacdrc_cfg:0, dachpf_cfg:0, ramp_func_used:1, pa_msleep_time:160, pa_ctl_level:0, gpio-spk:0 [ 1.006385] sndhdmi sndhdmi: ASoC: CPU DAI (null) not registered [ 1.013225] sndhdmi sndhdmi: snd_soc_register_card() failed: -517
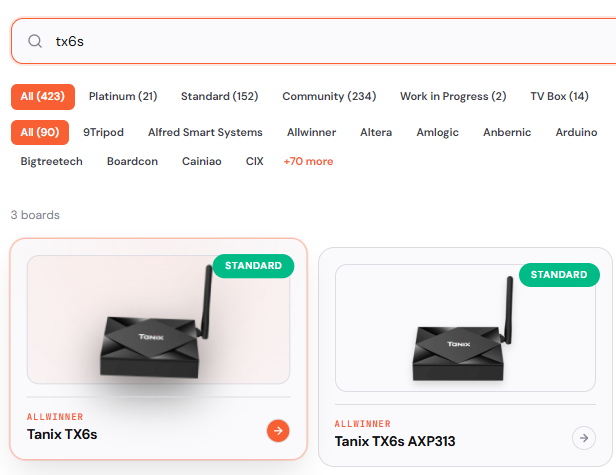
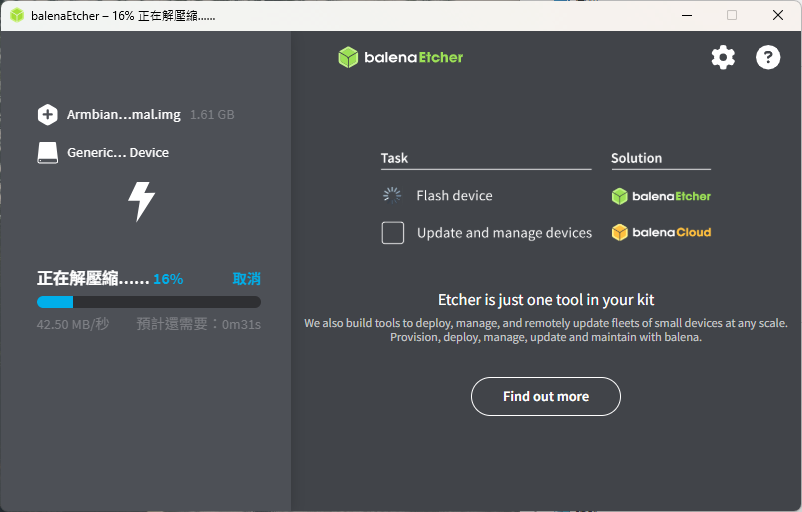
燒錄 這台機上盒使用的 Soc 是 Allwinner H616,電源管理晶片為 AXP305,板子為 TX6s,在 Armbian 找到對應的板子,進行下載後燒綠進 SD 卡。
可惜實測運行時會找不到有線網路,日後再研究,先外接 USB 網卡取代。
初始化 啟動後,等待一段時間,使用 ssh 指令登入,預設密碼是 1234
1 ssh root@<your-board-ip>
做完相關設定後,第一步就完成囉!
安裝 OMV 參考 https://docs.armbian.com/software/omv/ ,會透過網路下載和安裝 OMV,需要一些時間
1 armbian-config --cmd OMV001
完成後,瀏覽 http://<your.IP>:80
打通有線網路
幾個月前 Armbian 還未支援 TX6s 的板子,所以筆者是用最接近的 X96 Mate 燒錄後運行,可以開機啟動,但找不到有線網路,表示設備樹需調整。因此會以 X96 Mate 為基礎,來新增設定檔和修改 DTS 設備樹。
環境建置 使用 Ubuntu 24.04 (WSL2) 進行編譯
下載 Armbian
1
2
git clone https://github.com/armbian/build cd build
安裝工具包
1
2
3
sudo apt-get update -y sudo apt-get full-upgrade -y sudo apt-get install -y acl aptly aria2 axel bc binfmt-support binutils-aarch64-linux-gnu bison bsdextrautils btrfs-progs build-essential busybox ca-certificates ccache clang coreutils cpio crossbuild-essential-arm64 cryptsetup curl debian-archive-keyring debian-keyring debootstrap device-tree-compiler dialog dirmngr distcc dosfstools dwarves e2fsprogs expect f2fs-tools fakeroot fdisk file flex gawk gcc-arm-linux-gnueabi gdisk git gpg gzip imagemagick jq kmod libbison-dev libc6-dev-armhf-cross libcrypto++-dev libelf-dev libfdt-dev libfile-fcntllock-perl libfl-dev libfuse-dev libgcc-12-dev-arm64-cross libgmp3-dev liblz4-tool libmpc-dev libncurses-dev libpython3-dev libssl-dev libusb-1.0-0-dev linux-base lld llvm locales lz4 lzma lzop make mtools ncurses-base ncurses-term nfs-kernel-server ntpdate openssl p7zip p7zip-full parallel parted patchutils pbzip2 pigz pixz pkg-config pv python3 python3-dev python3-setuptools qemu-user-static rdfind rename rsync sudo swig tar tree u-boot-tools udev unzip util-linux uuid uuid-dev uuid-runtime vim wget whiptail xfsprogs xsltproc xz-utils zip zlib1g-dev zstd
新增設備 參考 https://github.com/armbian/build/blob/main/config/boards/x96-mate.tvb ,新增板子的設定檔
1 nano config/boards/tx6s.conf
1
2
3
4
5
6
7
8
9
10
11
12
13
14
# Allwinner H616 TVBox with 4GB of RAM and EMMC BOARD_NAME="Unblock TX6s" BOARD_VENDOR="allwinner" BOARDFAMILY="sun50iw9" BOARD_MAINTAINER="" INTRODUCED="2021" BOOTCONFIG="tx6s_defconfig" BOOT_LOGO="desktop" KERNEL_TARGET="current,edge" KERNEL_TEST_TARGET="current" FORCE_BOOTSCRIPT_UPDATE="yes" OVERLAY_PREFIX="sun50i-h616" enable_extension "uwe5622-allwinner"
取得原廠 DTS 有兩個方式,獲得轉換後的檔案 tx6s.dts
方法一:從原裝置取得 將設備樹複製到電腦上分析,筆者透過 TFTP 取檔
1
2
su busybox tftp -p -l /sys/firmware/fdt -r tx6s.dtb 192.168.1.100
回到 Ubuntu,把檔案放到 \\wsl$\Ubuntu\home\your_name 底下,輸入以下指令將二進位 dtb 轉為可讀的 dts
1 dtc -I dtb -O dts -o tx6s.dts tx6s.dtb
方法二:從原廠 IMG 取得 1 7z l x11_20210824.2008.img
輸出結果
1
2
3
4
5
6
7
8
9
10
11
12
13
14
15
16
17
18
19
20
21
22
Date Time Attr Size Compressed Name ------------------- ----- ------------ ------------ ------------------------ ..... 33554432 33554432 0.bootloader.img ..... 16777216 16777216 1.env.img ..... 33554432 33554432 2.boot.img ..... 2147483648 2147483648 3.super.img ..... 2147483648 2147483648 4.sysrecovery.img ..... 16777216 16777216 5.misc.img ..... 33554432 33554432 6.recovery.img ..... 1006632960 1006632960 7.cache.img ..... 16777216 16777216 8.vbmeta.img ..... 16777216 16777216 9.vbmeta_system.img ..... 16777216 16777216 10.vbmeta_vendor.img ..... 16777216 16777216 11.metadata.img ..... 16777216 16777216 12.private.img ..... 524288 524288 13.frp.img ..... 16252928 16252928 14.empty.img ..... 16777216 16777216 15.media_data.img ..... 16777216 16777216 16.Reserve0.img ..... 8192 8192 17.UDISK.img ------------------- ----- ------------ ------------ ------------------------ 5570043904 5570043904 18 files
解壓縮取得 0.bootloader.img 後,安裝 extract-dtb,用於取得 dtb
1
2
3
4
5
6
7
7z x x11_20210824.2008.img 0.bootloader.img sudo apt install python3.12-venv python3 -m venv myenv source myenv/bin/activate pip install extract-dtb extract-dtb 0.bootloader.img -o extracted_dtb deactivate
注意這裡會同時得到 dtb 和 kernel。
輸入以下指令將二進位 dtb 轉為可讀的 dts
1 dtc -I dtb -O dts -o tx6s.dts extracted_dtb/01_dtbdump_,sun50iw9.dtb
修改 uboot 的 DTS 1 ./compile.sh BOARD=tx6s BRANCH=current uboot-patch
看到暫停提示,先不要按 Enter
1
2
3
[💲|🚸] Make your changes in this directory: [ /home/XXX/build/cache/sources/u-boot-worktree/u-boot/v2024.01 ] [💲|🚸] Press <ENTER> after you are done [ editing files in /home/XXX/build/cache/sources/u-boot-worktree/u-boot/v2024.01 ] Press ENTER to show a preview of your patch, or type 'stop' to stop patching...
另開視窗
1
2
cd build/cache/sources/u-boot-worktree/u-boot/v2024.01/ sudo cp arch/arm/dts/sun50i-h616-x96-mate.dts arch/arm/dts/sun50i-h616-tx6s.dts
比對原廠 DTS (tx6s.dts) 和 X96 Mate DTS (sun50i-h616-x96-mate.dts),發現 X96 Mate DTS 支援 AXP305, AXP805, AXP806 的電源管理晶片,正好符合實際裝置上的 AXP305。
1
2
3
4
5
6
&r_rsb { status = "okay"; axp305: pmic@745 { compatible = "x-powers,axp305", "x-powers,axp805", "x-powers,axp806";
至於為何原廠 DTS 只支援 AXP806,卻也跑得起來就不清楚了。
1
2
3
pmu { compatible = "x-powers,axp806"; reg = <0x36>;
接著在原廠 DTS 找有線網路 eth 開頭的,底下表示 H616 內建的 PHY / 10/100 Ethernet
1
2
3
4
5
6
7
8
9
10
11
12
13
14
15
16
17
18
19
20
21
22
eth@05030000 { compatible = "allwinner,sunxi-gmac"; reg = <0x00 0x5030000 0x00 0x10000 0x00 0x3000034 0x00 0x04>; interrupts = <0x00 0x0f 0x04>; interrupt-names = "gmacirq"; clocks = <0xd5>; clock-names = "gmac"; device_type = "gmac1"; pinctrl-0 = <0xd6>; pinctrl-1 = <0xd7>; pinctrl-names = "default\0sleep"; phy-mode = "rmii"; tx-delay = <0x07>; rx-delay = <0x1f>; phy-rst; gmac-power0; gmac-power1; gmac-power2; status = "okay"; linux,phandle = <0x17b>; phandle = <0x17b>; };
1 sudo nano arch/arm/dts/sun50i-h616-tx6s.dts
修改內容
1
2
3
/ { model = "sun50iw9"; compatible = "hechuang,x96-mate", "allwinner,sun50i-h616";
1 sudo nano arch/arm/dts/Makefile
Makefile 中使用 Ctrl + W 找尋 H616 並修改底下這段
1
2
3
4
5
dtb-$(CONFIG_MACH_SUN50I_H616) += \ sun50i-h616-orangepi-zero2.dtb \ sun50i-h618-orangepi-zero3.dtb \ sun50i-h616-x96-mate.dtb \ sun50i-h616-tx6s.dtb
1
2
sudo cp configs/x96_mate_defconfig configs/tx6s_defconfig sudo nano configs/tx6s_defconfig
tx6s_defconfig 只改 CONFIG_DEFAULT_DEVICE_TREE,內容修改如下
1
2
3
4
5
6
7
8
9
10
11
12
13
14
15
16
17
18
19
20
21
22
23
24
CONFIG_ARM=y CONFIG_ARCH_SUNXI=y CONFIG_DEFAULT_DEVICE_TREE="sun50i-h616-tx6s" CONFIG_SPL=y CONFIG_DRAM_SUN50I_H616_DX_ODT=0x03030303 CONFIG_DRAM_SUN50I_H616_DX_DRI=0x0e0e0e0e CONFIG_DRAM_SUN50I_H616_CA_DRI=0x1c12 CONFIG_DRAM_SUN50I_H616_TPR0=0xc0000c05 CONFIG_DRAM_SUN50I_H616_TPR10=0x2f0007 CONFIG_DRAM_SUN50I_H616_TPR11=0xffffdddd CONFIG_DRAM_SUN50I_H616_TPR12=0xfedf7557 CONFIG_MACH_SUN50I_H616=y CONFIG_SUNXI_DRAM_H616_DDR3_1333=y CONFIG_R_I2C_ENABLE=y # CONFIG_SYS_MALLOC_CLEAR_ON_INIT is not set CONFIG_SPL_I2C=y CONFIG_SPL_SYS_I2C_LEGACY=y CONFIG_SYS_I2C_MVTWSI=y CONFIG_SYS_I2C_SLAVE=0x7f CONFIG_SYS_I2C_SPEED=400000 CONFIG_SUPPORT_EMMC_BOOT=y CONFIG_AXP305_POWER=y CONFIG_USB_EHCI_HCD=y CONFIG_USB_OHCI_HCD=y
回到原本的視窗按下 Enter,會在底下自動生成 output/patch/u-boot-sunxi64-current.patch
1 mv output/patch/u-boot-sunxi64-current.patch userpatches/u-boot/u-boot-sunxi/tx6s.patch
1 ./compile.sh BOARD=tx6s RELEASE=trixie BUILD_DESKTOP=no BUILD_MINIMAL=yes KERNEL_CONFIGURE=no
修改 kernel 的 DTS 1 ./compile.sh BOARD=tx6s BRANCH=current kernel-patch
看到暫停提示,先不要按 Enter
1
2
3
[💲|🚸] Make your changes in this directory: [ /home/XXX/build/cache/sources/linux-kernel-worktree/6.18__sunxi64__arm64 ] [💲|🚸] Press <ENTER> after you are done [ editing files in /home/XXX/build/cache/sources/linux-kernel-worktree/6.18__sunxi64__arm64 ] Press ENTER to show a preview of your patch, or type 'stop' to stop patching...
另開視窗將 dts 檔複製進去
1
2
3
cd build sudo cp ../tx6s.dts cache/sources/linux-kernel-worktree/6.18__sunxi64__arm64/arch/arm64/boot/dts/allwinner/sun50i-h616-tx6s.dts sudo nano cache/sources/linux-kernel-worktree/6.18__sunxi64__arm64/arch/arm64/boot/dts/allwinner/Makefile
Makefile 加入底下這段
1 dtb-$(CONFIG_ARCH_SUNXI) += sun50i-h616-tx6s.dtb
回到原本的視窗按下 Enter,會在底下自動生成 output/patch/kernel-sunxi64-current.patch
1
2
mkdir -p userpatches/kernel/sunxi64-current/ mv output/patch/kernel-sunxi64-current.patch userpatches/kernel/sunxi64-current/
參考資料
Day 16 。初入嵌入式開發-設備樹 (上) - iT 邦幫忙::一起幫忙解決難題,拯救 IT 人的一天