目的是有一個家用攝影機,偵測到物體移動後錄製,並在需要時回放觀看。
已有完整的開源專案https://github.com/s60sc/ESP32-CAM_MJPEG2SD,這篇記錄筆者一步步摸索踩坑的過程。
ESP32-CAM_MJPEG2SD
下載整個專案,解壓縮後如果後面有版號或 master 後輟,要拿掉,只保留 ESP32-CAM_MJPEG2SD 資料夾名稱,接著用 Arduino IDE 開啟專案內的 ino 檔。
檢查下 appGlobals.h 預設是選擇 #define CAMERA_MODEL_AI_THINKER,因筆者使用的就是 AI-Thinker ESP32-CAM 所以可以不用調整。
將 #define INCLUDE_RTSP 設成 true,後面會用到,同時安裝好 ESP32-RTSPServer 套件。
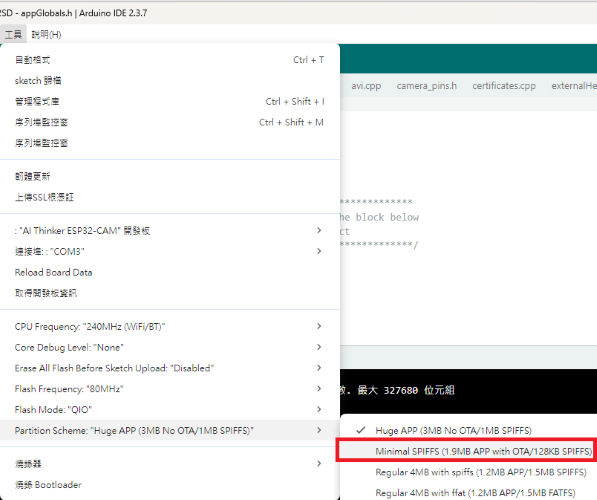
選擇「工具」>「Partition Scheme」>「Minimal SPIFFS (…)」後開始編譯和燒錄。
Compilation error: #error “Need to install ESP32-RTSPServer library”
將專案移到 C:\Users\XXX\Documents\Arduino 底下即可。
燒錄完成後,執行會看到以下訊息
1
2
3
4
5
6
7
8
9
10
11
12
13
14
15
16
17
18
19
20
21
| =============== ESP-CAM_MJPEG 10.9.2 ===============
[00:00:00.490 logSetup] Setup RAM based log, size 7168, starting from 55
[00:00:00.491 boardInfo] Chip ESP32-D0WD-V3, 2 cores @ 240Mhz, rev 3
[00:00:00.501 boardInfo] Flash 4.0MB, mode QIO @ 80Mhz
[00:00:00.501 boardInfo] PSRAM 4.0MB, mode QSPI @ 80Mhz
[00:00:00.512 logSetup] Compiled with arduino-esp32 v3.3.6
[00:00:00.512 printResetReason] Power on reset
[00:00:00.522 printWakeupReason] Wakeup by reset
[00:00:00.522 setup] Selected board CAMERA_MODEL_AI_THINKER
E (100) sdmmc_common: sdmmc_init_ocr: send_op_cond (1) returned 0x107
E (100) vfs_fat_sdmmc: sdmmc_card_init failed (0x107).
[00:00:00.562 WARN prepSD_MMC] SD card mount failed
[00:00:00.669 onNetEvent] Wifi Station started, connecting to:
[00:00:00.676 onNetEvent] Wifi AP stopped:
[00:00:00.679 onNetEvent] Wifi AP stopped:
[00:00:00.780 setWifiSTA] Wifi Station IP from DHCP
[00:00:03.170 WARN startWifi] SSID not connected not available, use AP
[00:00:03.179 startWebServer] Starting web server on port: 80
[00:00:03.180 startWebServer] Remote server certificates not checked
[00:00:03.180 WARN startWebServer] Startup Failure: Check SD card inserted
[00:00:03.190 loop] =============== Total tasks: 12 ===============
|
Startup Failure: Check SD card inserted
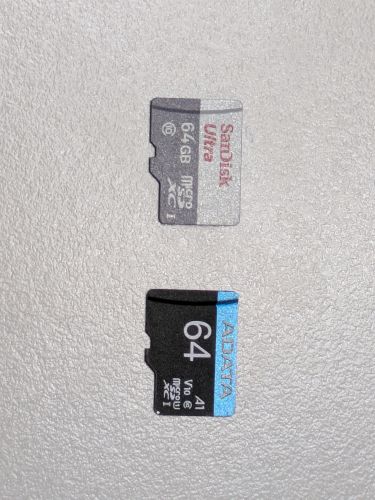
換一張 SD 卡試試,原本用的是 SanDisk 64GB,已格式化成 FAT32,換成另一張 ADATA 64GB 就奇蹟可以使用了。
後來發現還是與供電有關,電壓正常的話 SanDisk 64GB 也可以跑得起來。
1
2
3
4
5
6
7
8
9
10
11
12
13
14
15
16
17
18
19
20
21
22
23
24
25
26
| =============== ESP-CAM_MJPEG 10.9.2 ===============
[00:01:00.141 logSetup] Setup RAM based log, size 7168, starting from 1952
[00:01:00.141 WARN initBrownout] Brownout occurred due to inadequate power supply
[00:01:00.152 boardInfo] Chip ESP32-D0WD-V3, 2 cores @ 240Mhz, rev 3
[00:01:00.162 boardInfo] Flash 4.0MB, mode QIO @ 80Mhz
[00:01:00.162 boardInfo] PSRAM 4.0MB, mode QSPI @ 80Mhz
[00:01:00.173 logSetup] Compiled with arduino-esp32 v3.3.6
[00:01:00.173 printResetReason] Software reset due to brownout
[00:01:00.183 printWakeupReason] Wakeup by reset
[00:01:00.184 setup] Selected board CAMERA_MODEL_AI_THINKER
[00:01:00.231 infoSD] SD card type SDHC, Size: 59.5GB, using 1 bit mode @ 40MHz
[00:01:00.232 listFolder] Sketch size 1.6MB
[00:01:00.542 listFolder] File: /data/configs.txt, size: 8266 bytes, Date: 01 Jan 1980 00:00:00
[00:01:00.543 listFolder] SD_MMC: 80KB used of 59.5GB
[00:01:00.553 loadConfig] Load config
[00:01:00.839 updateAppStatus] Enabling motion detection by camera
[00:01:00.844 prepCam] Max frame size for 4.0MB PSRAM is UXGA
[00:01:01.113 prepCam] Camera model OV2640 ready @ 20MHz
[00:01:01.214 onNetEvent] Wifi Station started, connecting to:
[00:01:01.215 onNetEvent] Wifi AP SSID: ESP-CAM_MJPEG_800825182EC8 started, use 'http://192.168.4.1' to connect
[00:01:01.370 setWifiSTA] Wifi Station IP from DHCP
[00:01:03.772 WARN startWifi] SSID not connected not available, use AP
[00:01:03.775 startWebServer] Starting web server on port: 80
[00:01:03.776 startWebServer] Remote server certificates not checked
[00:01:03.786 WARN startWebServer] Startup Failure: Crash loop detected, check log (brownout)
[00:01:03.796 loop] =============== Total tasks: 13 ===============
|
Crash loop detected, check log (brownout)
表示供電不足,參考 ESP32-CAM Troubleshooting Guide: Most Common Problems Fixed。
換個麵包板,或是不要透過麵包板,直接接杜邦線試試。
初始化
透過 http://192.168.4.1 上的網頁選擇 wifi 路由器並輸入密碼。
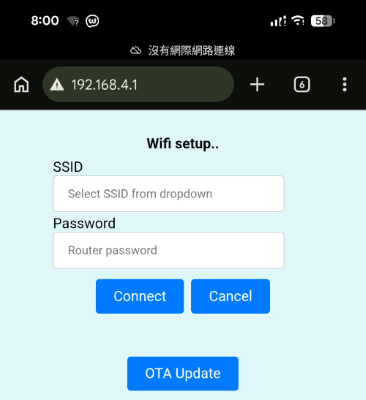
設定好後,會開始從 GitHub 下載相關網頁檔案。
1
2
3
4
5
6
7
8
| [00:00:08.639 wgetFile] Downloading /data/common.js from /s60sc/ESP32-CAM_MJPEG2SD/master/data/common.js
[00:00:09.564 wgetFile] Downloaded /data/common.js, size 51KB
[00:00:10.170 wgetFile] Downloading /data/MJPEG2SD.htm from /s60sc/ESP32-CAM_MJPEG2SD/master/data/MJPEG2SD.htm
[14:04:30.837 wgetFile] Downloaded /data/MJPEG2SD.htm, size 101KB
[14:04:56.514 getLocalNTP] Using NTP server: pool.ntp.org
[14:04:56.515 showLocalTime] Got current time from NTP: 23/02/2026 14:04:56 with tz: GMT0
[14:05:26.426 setAlarm] Alarm scheduled at 24/02/2026 01:00:00
[14:05:27.509 saveConfigVect] Config file saved 218 entries
|
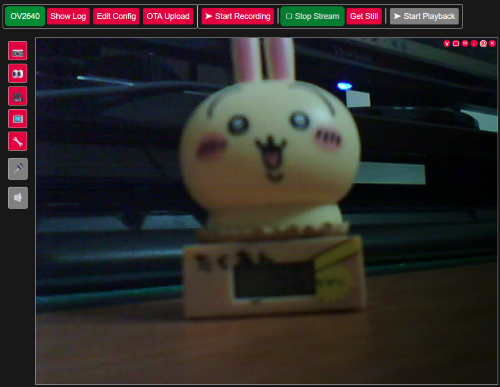
手動重啟並重新連上 wifi 路由器新指派的 IP 位址,就可以開啟鏡頭畫面查看。
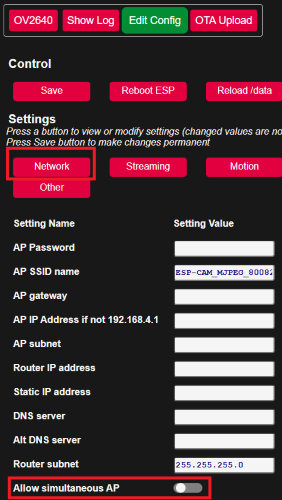
筆者接著會將 AP 模式關閉,避免外部人士連進來,造成隱私洩漏。
選擇「Edit Config」>「Network」> 關掉「Allow simultaneous AP」> 記得「Save」
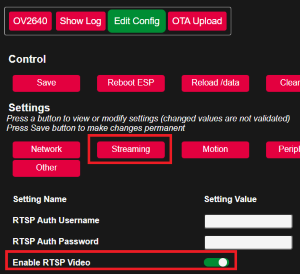
motionEye 遠端監控
先打開 RTSP 串流,選擇「Edit Config」>「Streaming」> 開啟「Enable RTSP Video」> 記得「Save」
重啟後查看,可以看到服務已啟動。
1
2
| [14:33:21.810 prepRTSP] RTSP server started successfully with transport: Video
[14:33:21.810 prepRTSP] Connect to: rtsp://your_ip:554
|
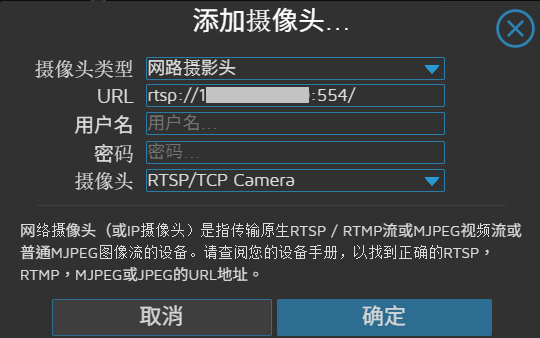
Home Assistant 安裝 motionEye 後,進入 motionEye 「添加攝像頭」> 選擇「網路攝影頭」,輸入 Log 看到的 RTSP 網址,以後便可透過 Home Assistant 查看。